Imagine slicing into a light and fluffy Kiwi Blender Cake, where the vibrant green of fresh kiwis dances with the sweet aroma wafting through your kitchen. Each bite bursts with tangy sweetness, perfectly balanced by a soft, airy texture that melts in your mouth like a dream. This delightful treat is not just a cake; it’s a celebration of summer, ideal for picnics or family gatherings when you want to impress without all the fuss.
I still remember my first attempt at making this cake; it was a sunny afternoon filled with laughter and flour explosions as my kids helped me blend the ingredients. The anticipation of that first slice, paired with the joy of sharing something homemade, made the whole experience unforgettable. With every forkful, you’ll find yourself transported to sun-drenched orchards, promising an amazing flavor adventure that’s both refreshing and satisfying.
Why Is Kiwi Blender Cake So Irresistibly Good?
Light and fluffy texture makes each bite a delightful experience. Fresh kiwi adds a unique tang that elevates the flavor profile, making it a refreshing dessert. Quick prep time of just 15 minutes means you can whip this up in no time! Versatile for any occasion, whether it’s a summer barbecue or a cozy family dinner, this cake is sure to impress. Plus, with minimal ingredients like all-purpose flour and eggs, it’s an easy recipe that delivers big on taste!
Kiwi Blender Cake Ingredients
- For the Batter
- 2 medium kiwis (peeled and chopped) – Fresh kiwis add a delightful tang and vibrant color to your cake.
- 1 cup all-purpose flour – This is the base for your cake, giving it structure and fluffiness.
- 1 cup granulated sugar – Sweetens the batter, balancing the tartness of the kiwis beautifully.
- 1/2 cup vegetable oil – Keeps the cake moist and enhances its light texture.
- 1 cup milk – Adds moisture and helps create a tender crumb in your Kiwi Blender Cake.
- 3 large eggs – These provide richness and stability to your cake’s structure.
- 2 teaspoons baking powder – Essential for leavening, ensuring your cake rises perfectly.
- 1 teaspoon vanilla extract – Adds a warm, sweet aroma that complements the kiwi flavor.
- 1/4 teaspoon salt – Enhances flavors and balances sweetness for a delicious result.
Simple Steps to Create a Fluffy Dessert
1. Preheat the oven to 350°F (175°C). Greasing and flouring your baking pan ensures that your light and fluffy kiwi cake pops out effortlessly once baked, setting you up for success!
2. Blend together the chopped kiwis, granulated sugar, vegetable oil, milk, and eggs in a blender until smooth. This vibrant mixture will be the heart of your Kiwi Blender Cake, infusing it with delightful fruity flavor.
3. Whisk together the all-purpose flour, baking powder, and salt in a mixing bowl. This step creates the perfect dry mix that will help your cake rise beautifully while balancing out the sweetness of the kiwi.
4. Combine the blended kiwi mixture with the dry ingredients, stirring gently until just combined. Adding one teaspoon of vanilla extract at this stage will elevate your cake’s aroma and taste!
5. Pour the batter into your prepared baking pan. Ensure it’s evenly distributed for uniform baking; this will help achieve that lovely golden-brown top we all love.
6. Bake for 30 minutes or until a toothpick inserted into the center comes out clean. Keep an eye on it—your kitchen will be filled with an irresistible scent as it bakes!
7. Cool the cake in the pan for 10 minutes before transferring it to a wire rack to cool completely. This allows it to firm up slightly, making it easier to slice when you’re ready to serve.
Optional: Dust with powdered sugar before serving for an extra touch of sweetness!
Exact quantities are listed in the recipe card below.
Helpful Hints From My Own Kitchen
- Fresh Kiwi Matters: Use ripe, sweet kiwis for the best flavor. Overripe or underripe kiwis can affect the cake’s taste and texture.
- Don’t Overmix: Mix until just combined after adding the kiwi mixture to the dry ingredients. Overmixing can lead to a dense cake instead of the light, fluffy Kiwi Blender Cake you desire.
- Check Oven Temperature: Ovens can vary, so it’s wise to use an oven thermometer. Baking at the correct temperature ensures even cooking and prevents a soggy center.
- Cool Properly: Let the cake cool in the pan for 10 minutes before transferring it. This step helps prevent it from breaking apart during transfer.
- Keep It Simple: Avoid adding too many extra ingredients like nuts or chocolate chips, which can overwhelm the delicate kiwi flavor in your cake.
Storage and Freezing Made Easy

- Room Temperature: Keep the Kiwi Blender Cake covered at room temperature for up to 2 days. This will maintain its delightful fluffiness.
- Fridge: For longer freshness, store the cake in an airtight container in the fridge for up to 5 days. This helps preserve its moisture and flavor.
- Freezer: You can freeze slices of Kiwi Blender Cake wrapped tightly in plastic wrap and then in foil for up to 3 months. Thaw overnight in the fridge before serving.
- Reheating: To enjoy your cake warm, simply microwave a slice for about 10-15 seconds. It’s perfect for bringing back that just-baked taste!
Creative Variations and Alternatives
Feel free to get creative and customize this delightful dessert to suit your taste and dietary needs!
- Gluten-Free: Substitute all-purpose flour with a 1:1 gluten-free baking mix for a lighter version. Your cake will still be fluffy and delicious, perfect for those avoiding gluten.
- Plant-Based: Replace eggs with 1/4 cup of unsweetened applesauce per egg used. This twist keeps the cake moist and adds a hint of sweetness without the animal products.
- Extra Fruit: Add 1/2 cup of chopped strawberries or peaches for a fruity explosion in every bite. Mixing fruits not only elevates the flavor but also creates a beautiful visual appeal.
- Coconut Oil: Swap vegetable oil for coconut oil to introduce a subtle, tropical flavor. The richness of coconut will add depth while keeping the cake tender and moist.
- Vanilla Bean: Use the seeds from half a vanilla bean instead of vanilla extract for an aromatic boost. This little change enhances the overall flavor profile, making each slice even more indulgent.
- Citrus Zest: Incorporate zest from one lemon or lime into the batter for a refreshing zing. The bright citrus notes complement the kiwi beautifully, creating an uplifting dessert experience.
- Spiced Up: Add 1 teaspoon of ground cinnamon or nutmeg for a warm spice twist. This variation lends an inviting warmth that makes this cake perfect for cozy gatherings.
- Chili Kick: For those who enjoy heat, fold in a pinch of cayenne pepper or finely chopped jalapeños. This unexpected addition brings an exciting contrast to the sweet kiwi!
Make Ahead Options
Preparing your Kiwi Blender Cake in advance is a delightful way to save time and ensure you have a refreshing dessert ready to impress! You can pre-chop the kiwis and store them in an airtight container in the fridge for up to 24 hours. Additionally, you can measure out your all-purpose flour, granulated sugar, and baking powder, storing them together to streamline the process. For best results, mix the wet ingredients—kiwis, oil, milk, eggs, and vanilla extract—just before you’re ready to bake, as this ensures maximum freshness. When you’re ready to serve, simply blend your wet ingredients, combine with the dry mix, pour into your prepared pan, and bake for about 30 minutes. The result will be a light and fluffy Kiwi Blender Cake that tastes just as good as if it were made fresh!
FAQs About Your New Favorite Dessert
What type of kiwis should I use for this cake?
Using fresh, ripe medium kiwis is key to achieving the best flavor and texture in your Kiwi Blender Cake. Look for kiwis that yield slightly to pressure and have a vibrant green color inside. If you can’t find fresh kiwis, you might consider using frozen ones; just make sure they are thawed and well-drained before blending.
Can I substitute any ingredients in the Kiwi Blender Cake?
Absolutely! If you’re looking for alternatives, you can replace all-purpose flour with a gluten-free blend or almond flour. For a dairy-free version, swap out the milk with almond or oat milk, and use a plant-based oil instead of vegetable oil. The cake will still turn out light and fluffy!
How should I store my leftover Kiwi Blender Cake?
To keep your Kiwi Blender Cake fresh, store it in an airtight container at room temperature for up to 2 days. If you want to extend its shelf life, refrigerate it where it can last for about a week. Just remember to bring it back to room temperature before enjoying for the best flavor.
Can I freeze the Kiwi Blender Cake?
Yes, you can freeze this delightful cake! Wrap individual slices tightly in plastic wrap, then place them in a freezer-safe bag or container. It’s best enjoyed within 2-3 months of freezing. When you’re ready to indulge again, simply let it thaw overnight in the fridge or at room temperature for a few hours.
What if my cake doesn’t rise properly?
If your Kiwi Blender Cake doesn’t rise as expected, double-check that your baking powder is fresh—it should fizz when mixed with liquid! Also, ensure that you didn’t overmix your batter; mix just until combined for the fluffiest result. Overmixing can lead to denser cakes.
How many servings does this recipe yield?
This recipe makes about 4 generous servings—perfect for an intimate family gathering or a cozy dessert after dinner. Each slice contains approximately 250 calories, making it a light yet satisfying treat that won’t weigh you down!
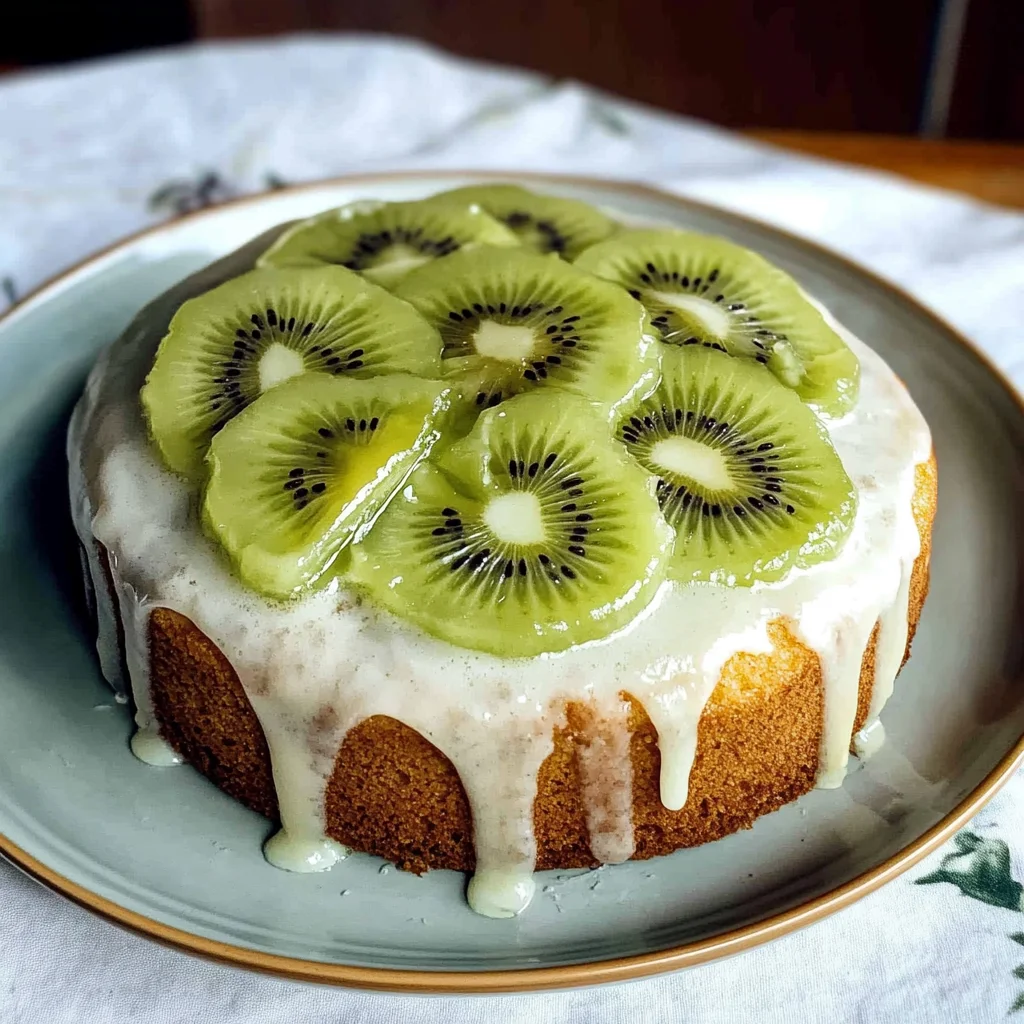
Kiwi Blender Cake
Ingredients
Method
- Preheat the oven to 350°F (175°C). Grease and flour a baking pan.
- In a blender, combine the chopped kiwis, sugar, oil, milk, and eggs. Blend until smooth.
- In a mixing bowl, whisk together the flour, baking powder, and salt.
- Pour the blended kiwi mixture into the dry ingredients and stir until just combined. Add vanilla extract.
- Pour the batter into the prepared baking pan.
- Bake for 30 minutes or until a toothpick inserted into the center comes out clean.
- Allow the cake to cool in the pan for 10 minutes before transferring to a wire rack to cool completely.