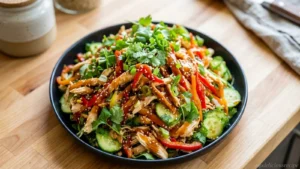
Imagine sinking your teeth into a rack of dry rub ribs, where every bite reveals a symphony of smoky, savory flavors that dance on your palate. The tantalizing aroma wafts through the air, teasing your senses and promising an unforgettable culinary experience that’s perfect for summer barbecues or cozy family dinners.
As I recall the first time I savored these dry rub ribs at a backyard gathering, laughter mingled with the mouthwatering scent of spices, creating memories that still bring a smile to my face. Whether you’re firing up the grill for game day or celebrating a special occasion, these tender, flavorful ribs will elevate any feast and leave everyone craving more.
Why Will You Keep Making Dry Rub Ribs?
Tender, juicy ribs slathered in a mouthwatering dry rub make every bite an explosion of flavor. Easy to prepare, just 15 minutes of prep time means more time enjoying with friends and family. Versatile cooking options allow you to grill or smoke, adapting to your style. Unique spices, like paprika and cayenne, create a balance of sweetness and heat that will have everyone coming back for seconds. Crowd-pleaser? Absolutely! These ribs are perfect for any gathering, ensuring you’ll be the star of the barbecue!
Dry Rub Ribs Ingredients
For the Dry Rub
- 2 tablespoons Brown Sugar – Adds a touch of sweetness that caramelizes beautifully on the grill.
- 1 tablespoon Paprika – Provides a rich color and mild flavor, enhancing the overall taste of the ribs.
- 1 tablespoon Salt – Essential for bringing out the flavors in this savory rub.
- 1 tablespoon Black Pepper – Offers a subtle kick to balance the sweetness of the brown sugar.
- 1 teaspoon Garlic Powder – Infuses a robust garlic flavor that complements the meat perfectly.
- 1 teaspoon Onion Powder – Adds depth and savory notes to the dry rub mix.
- 1 teaspoon Cayenne Pepper (optional for heat) – Use to spice things up if you enjoy a little heat in your Dry Rub Ribs!
- 1 teaspoon Dried Oregano – Brings an earthy, aromatic quality that pairs well with pork.
For the Ribs
- 2 pounds Pork Ribs (Baby back or spare ribs) – Choose your favorite cut for tender, juicy results that will impress your family and friends.
Crafting The Perfect BBQ Ribs
1. Mix the Dry Rub: In a mixing bowl, combine 2 tablespoons brown sugar, 1 tablespoon paprika, 1 tablespoon salt, and 1 tablespoon black pepper. Add in 1 teaspoon garlic powder, 1 teaspoon onion powder, and if you like a little kick, toss in 1 teaspoon cayenne pepper and 1 teaspoon dried oregano. Mix well until all ingredients are evenly blended.
2. Prepare the Ribs: Carefully remove the membrane from the back of the 2 pounds of pork ribs. This vital step enhances flavor absorption, ensuring each bite is tender and juicy.
3. Apply the Rub: Generously coat both sides of the ribs with your savory dry rub mixture. Don’t be shy! Wrap them up in plastic wrap and let them chill in the refrigerator for at least one hour; overnight is even better for deeper flavor.
4. Preheat the Grill: Set your grill to a low temperature between 225°F to 250°F. This gentle heat allows the flavors to develop beautifully while keeping the ribs tender during their long cook.
5. Cook the Ribs: Place the ribs on the grill bone side down. Cook them for 3 to 4 hours, maintaining that consistent low temperature for perfectly smoked goodness.
6. Check for Doneness: Use a meat thermometer to ensure your ribs reach an internal temperature of 190°F to 203°F. They should be tender enough that a toothpick can easily slide through!
7. Rest Before Slicing: Once cooked, remove the ribs from the grill and let them rest for about 10 minutes. This helps lock in those delicious juices before you slice into them.
Optional: Serve with your favorite barbecue sauce for dipping!
Exact quantities are listed in the recipe card below.
Expert Tips From My Own Kitchen
- Membrane Removal: Before applying the rub, always remove the membrane from the ribs’ back. This allows flavors to penetrate better and ensures tenderness.
- Generous Coating: Don’t be shy with the dry rub! Apply it liberally on both sides of the ribs. A well-coated rib means maximum flavor in every bite.
- Refrigeration Time: For optimal flavor infusion, refrigerate the dry-rubbed ribs overnight. If short on time, at least one hour will still help.
- Consistent Temperature: Maintain a low and steady grill temperature between 225°F to 250°F. This slow cooking method helps break down the collagen for tender Dry Rub Ribs.
- Check Internal Temp: Use a meat thermometer to ensure doneness. Ribs should reach an internal temperature of 190°F to 203°F for perfect tenderness—don’t rely solely on time!
- Resting Period: Allow the ribs to rest for at least 10 minutes after cooking before slicing. This helps juices redistribute, resulting in juicy, flavorful bites.
Storing and Freezing Your Ribs

- Room Temperature: Allow your Dry Rub Ribs to rest at room temperature for no more than 2 hours after cooking to ensure food safety.
- Fridge: Store leftover Dry Rub Ribs in an airtight container or tightly wrapped in plastic wrap for up to 3 days. This keeps them tender and flavorful.
- Freezer: For longer storage, freeze your Dry Rub Ribs in a zip-top freezer bag, removing as much air as possible. They’ll stay fresh for up to 3 months.
- Reheating: To enjoy your Dry Rub Ribs again, thaw in the fridge overnight, then reheat in a preheated oven at 350°F (175°C) for about 20 minutes or until warm.
Customize Your Ribs Experience
Feel free to get creative with this recipe, allowing your taste buds to dance with joy!
- Smoky Twist: Add 1 tablespoon of smoked paprika for an extra layer of depth. The smoky flavor will elevate your ribs to new heights, making them irresistible at any gathering.
- Sweet and Spicy: Incorporate 1 teaspoon of chili powder along with the cayenne for a sweet heat. This combination brings a delightful warmth that lingers, perfect for those who love a spicy kick.
- Herbaceous Delight: Swap out oregano for 1 teaspoon of dried thyme or rosemary. These herbs provide an aromatic freshness that complements the richness of the ribs beautifully.
- Citrusy Zing: Mix in 1 teaspoon of lemon zest. The citrus adds a bright note that cuts through the richness, creating a well-balanced finish that will surprise and delight your guests.
- Garlic Lovers: Increase the garlic powder to 2 teaspoons for an extra punch. More garlic means more flavor, making every bite a savory explosion for garlic enthusiasts.
- Maple Infusion: Replace brown sugar with maple sugar or syrup for a unique sweetness. This twist offers a subtle yet distinctive flavor, enhancing the overall taste experience without overpowering it.
- Gluten-Free Option: Ensure all spices are certified gluten-free, particularly if using pre-packaged mixes. This ensures everyone can savor these delicious ribs without worry.
- Vegan Alternative: For plant-based needs, try using tofu ribs marinated in the dry rub mixture. While they won’t mimic pork exactly, they can absorb all those wonderful flavors beautifully!
Make Ahead Options
Preparing Dry Rub Ribs is an excellent choice for meal prep, allowing you to savor tender, flavorful ribs without the last-minute rush. You can mix the dry rub in advance by combining 2 tablespoons of brown sugar, 1 tablespoon of paprika, 1 tablespoon of salt, 1 tablespoon of black pepper, 1 teaspoon each of garlic powder, onion powder, cayenne pepper (if you like some heat), and dried oregano in a mixing bowl. After removing the membrane from your 2 pounds of pork ribs, generously apply this dry rub to coat both sides. Wrap the seasoned ribs in plastic wrap and refrigerate them for up to 24 hours — or better yet, let them marinate overnight for maximum flavor. When you’re ready to cook, simply preheat your grill to a low temperature of 225°F to 250°F and follow the cooking instructions as outlined. This make-ahead strategy not only saves time but ensures your Dry Rub Ribs are bursting with flavor when it’s time to gather around the table!
Common Ribs Queries Clarified
What kind of ribs should I use for this recipe?
For this dry rub ribs recipe, you can use either baby back ribs or spare ribs. Baby back ribs are leaner and more tender, while spare ribs have more fat and flavor. Choose based on your preference!
How long should I let the dry rub sit on the ribs before cooking?
It’s best to let the dry rub sit on the ribs for at least 1 hour; however, if you can refrigerate them overnight, that’s even better! This allows the flavors to deeply penetrate the meat, resulting in a richer taste.
Can I freeze the dry-rubbed ribs?
Absolutely! If you want to prepare ahead, after applying the dry rub, wrap the ribs tightly in plastic wrap and then in aluminum foil. They can be frozen for up to 3 months. Just remember to thaw them in the refrigerator overnight before grilling.
What if my ribs aren’t tender after cooking?
If your ribs aren’t as tender as you’d like after 3 to 4 hours of cooking, don’t panic! You can wrap them in foil and return them to the grill for an additional 30-60 minutes. This steaming method will help break down any remaining toughness.
How should I store leftover dry rub ribs?
Store any leftover dry rub ribs in an airtight container in the refrigerator for up to 3 days. When you’re ready to enjoy them again, gently reheat them in the oven at a low temperature (around 250°F) until warmed through.
How many servings does this recipe yield?
This recipe makes about 4 servings, with each serving containing approximately 350 calories. Perfect for a family gathering or a cozy weekend BBQ!
Smoky Savory Dry Rub Ribs
Ingredients
Method
- Mix the dry rub by combining brown sugar, paprika, salt, black pepper, garlic powder, onion powder, cayenne pepper, and dried oregano in a mixing bowl.
- Carefully remove the membrane from the back of the pork ribs.
- Generously coat both sides of the ribs with the dry rub mixture and wrap in plastic wrap; refrigerate for at least one hour or overnight.
- Preheat the grill to a low temperature between 225°F to 250°F.
- Place the ribs on the grill bone side down and cook for 3 to 4 hours.
- Use a meat thermometer to ensure the ribs reach an internal temperature of 190°F to 203°F.
- Once cooked, remove the ribs from the grill and let them rest for about 10 minutes.