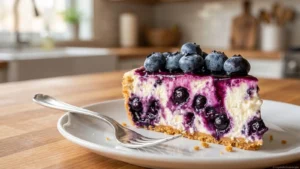
If you’re looking to impress your guests at your next gathering or simply want to treat yourself to something special, then this Green Velvet Cheesecake is the answer. Combining the unique allure of green velvet cake with the creamy decadence of cheesecake, this dessert is not only visually stunning but also incredibly delicious. The layers of fluffy cheesecake are perfectly complemented by a vibrant green cake base, making it a showstopper on any dessert table. It’s easy to prepare and offers a delightful change from traditional desserts. With every bite, you’ll enjoy the rich flavor profile and smooth texture that makes this treat unforgettable. Whether it’s for a birthday party, holiday celebration, or just a cozy evening at home, this Green Velvet Cheesecake will surely steal the spotlight. Let’s dive into why you’ll love this incredible recipe!
Why You’ll Love This Green Velvet Cheesecake
- Visually Stunning: The bright green color makes it an eye-catching centerpiece for any event.
- Decadent Flavor: Rich cream cheese combined with velvety cake creates an indulgent treat that satisfies sweet cravings.
- Easy to Make: With straightforward steps and common ingredients, even novice bakers can create this delightful dessert.
Ingredients for Green Velvet Cheesecake
Here’s what you’ll need to make this delicious dish:
- All-Purpose Flour: Essential for providing structure to the cake; sifted for best results.
- Cocoa Powder: Use unsweetened cocoa powder to enhance the chocolate flavor in the batter.
- Sugar: Granulated sugar adds sweetness; adjust according to your taste preference.
- Baking Powder: Helps the cake rise and achieve a light texture.
- Salt: A pinch enhances all flavors in the cheesecake.
- Vegetable Oil: Keeps the cake moist; you can substitute with melted butter if desired.
- Buttermilk: Adds tanginess and moisture; homemade buttermilk can be made using milk and vinegar or lemon juice.
- Eggs: Essential for binding ingredients together; use room temperature eggs for better mixing.
- Green Food Coloring: To achieve that signature green hue; gel food coloring works best.
- Cream Cheese: The star ingredient of the cheesecake layer; ensure it’s softened for easy mixing.
- Sour Cream: Adds richness and depth of flavor to the filling.
The full ingredients list, including measurements, is provided in the recipe card directly below.
Looking for more recipe inspiration? Click here!
Crafting a Delicious Dessert from Scratch
Follow these simple steps to prepare this delicious dish:
Step 1: Preheat Your Oven
Preheat oven to 325°F (163°C). Prepare a springform pan by greasing it lightly with butter or cooking spray.
Step 2: Prepare Cake Batter
In a large mixing bowl, whisk together flour, cocoa powder, baking powder, and salt until well combined.
Step 3: Mix Wet Ingredients
In another bowl, mix oil, sugar, buttermilk, eggs, and food coloring until smooth. Gradually add dry ingredients into wet mixture until just combined.
Step 4: Bake Cake Layer
Pour batter into the prepared springform pan. Bake for about 30-35 minutes or until a toothpick inserted comes out clean. Allow cooling completely before adding cream cheese layer.
Step 5: Prepare Cream Cheese Filling
In a separate bowl, beat softened cream cheese until smooth. Add sour cream and sugar while continuing to blend until fully incorporated.
Step 6: Assemble Dessert
Spread cream cheese filling over cooled cake layer evenly. Refrigerate for at least four hours or until firm before slicing.
Transfer to plates and enjoy each bite of this exquisite Green Velvet Cheesecake!
For more tasty options, look no further!
Tips and Tricks
Here are some helpful tips to ensure the best results for your dish:
- Room Temperature Ingredients: Allow ingredients like cream cheese and eggs to come to room temperature for easier blending.
- Bake Evenly: Rotate your pan halfway through baking time for consistent heat distribution.
- Cooling Time: Be patient; letting your cheesecake cool properly enhances its texture and flavor.
Find your next favorite dish right here!
Presentation Ideas for Your Sweet Treat
This Green Velvet Cheesecake is versatile and pairs wonderfully with:
- Fresh Berries: The tartness of berries complements the richness of the cheesecake, enhancing every bite.
- Chocolate Sauce: A drizzle of chocolate sauce adds an indulgent touch, making the dessert even more decadent.
- Whipped Cream: Light and airy whipped cream provides a perfect contrast to the dense texture of the cheesecake.
Feel free to pair it with your favorite sides for a personalized meal!
Make Ahead and Storage
- Make Ahead: You can prepare the Green Velvet Cheesecake up to two days in advance. Bake it, let it cool completely, and then refrigerate it covered until ready to serve. This allows the flavors to meld beautifully.
- Storing: Store any leftovers in an airtight container in the fridge for up to five days. If you want to keep it longer, consider freezing slices wrapped tightly in plastic wrap and then placed in a freezer-safe container for up to three months.
- Reheating: To enjoy leftover cheesecake, let it sit at room temperature for about 30 minutes or microwave individual slices on low power for about 10-15 seconds until just warmed through. Avoid overheating to maintain its creamy texture.
Turn your meal into a feast with this recipe!
Flavor Pairings to Elevate Your Dessert
Avoid Overmixing the Batter
Overmixing can ruin the texture of your green velvet cheesecake. When you incorporate your ingredients, mix just until combined. This keeps air bubbles at bay and ensures a dense, creamy cheesecake. If you overmix, the final product may become too light and airy, losing that rich cheesecake density we all love. Always remember to scrape down the sides of your mixing bowl to ensure even mixing without excessive agitation. Take care not to develop the gluten in your flour—this can also lead to unwanted texture changes.
Use Room Temperature Ingredients
One common mistake when making green velvet cheesecake is using cold ingredients straight from the fridge. For the best results, let your cream cheese, eggs, and other dairy products sit out for about 30 minutes before you start mixing. Room temperature ingredients blend more smoothly and create a unified mixture that bakes evenly. Cold ingredients can lead to lumps in your batter, which impacts both the appearance and taste of your cake. Ensure everything is at room temperature for a silky-smooth batter that will bake beautifully.
Choose Quality Food Coloring
When it comes to achieving that signature green hue in your green velvet cheesecake, not all food colorings are created equal. Opt for high-quality gel or liquid food colorings rather than cheap supermarket brands. Gel colors tend to provide a richer pigment without altering the batter’s consistency as much as liquid dyes do. Start with a small amount; you can always add more if needed. This ensures that you achieve the perfect shade without overwhelming the flavor of your cheesecake.
Don’t Skip Chilling Time
Chilling time is crucial for a successful green velvet cheesecake. After baking, allow it to cool at room temperature before refrigerating it for several hours or overnight. This chilling period helps set the cheesecake and enhances its flavors as they meld together. Skipping this step often results in a runny texture and poor flavor development. A well-chilled cheesecake slices cleanly and looks more appealing on the plate, ensuring an impressive presentation for guests.
FAQs
What makes green velvet cheesecake different from regular cheesecake?
Green velvet cheesecake stands out due to its unique color and flavor profile. The vibrant green hue comes from food coloring mixed into a traditional cream cheese base, while its flavor incorporates hints of cocoa powder—though much less than in chocolate cheesecakes. The slight chocolate undertone combined with creamy richness creates a delightful dessert experience that feels festive and special compared to regular cheesecakes.
Can I make green velvet cheesecake ahead of time?
Absolutely! In fact, making green velvet cheesecake ahead of time is highly recommended. It benefits from chilling in the refrigerator overnight, allowing flavors to deepen and develop fully while achieving the perfect texture. Store it tightly covered in plastic wrap or in an airtight container to maintain freshness. This makes it an excellent choice for parties or gatherings where you want to impress guests without last-minute preparation stress.
How should I store leftover green velvet cheesecake?
To store leftover green velvet cheesecake properly, keep it refrigerated in an airtight container or tightly wrapped with plastic wrap. It should remain fresh for up to five days in the fridge without losing its flavor or texture quality. If you need to store it longer, consider freezing portions of it instead; just be sure to wrap each slice well before placing them in a freezer-safe container or bag.
Can I use alternative sweeteners in my green velvet cheesecake?
Yes! You can substitute traditional sugar with alternative sweeteners like stevia or erythritol if you’re looking for a lower-calorie option or have dietary restrictions regarding sugar intake. However, keep in mind that these substitutes may alter both taste and texture slightly compared to regular sugar. Experimenting with ratios will help you find the right balance while still achieving that creamy deliciousness characteristic of a classic green velvet cheesecake.
Craving something different? Try this next!
Final Thoughts on This Irresistible Delight
Creating a stunning green velvet cheesecake involves understanding key elements that contribute to its success. Avoid overmixing and ensure all ingredients are at room temperature for optimal blending—this greatly affects texture and taste quality. Selecting high-quality food coloring will enhance its visual appeal without compromising flavor integrity while ample chilling time allows flavors to meld beautifully together after baking.

Green Velvet Cheesecake
Ingredients
Method
- Preheat oven to 325°F (163°C) and grease a springform pan.
- In a bowl, whisk together flour, cocoa powder, baking powder, and salt.
- In another bowl, mix oil, sugar, buttermilk, eggs, and food coloring until smooth. Gradually combine with dry ingredients.
- Pour batter into the greased pan and bake for 30-35 minutes or until a toothpick comes out clean. Allow cooling completely.
- For the cream cheese filling, beat softened cream cheese until smooth; add sour cream and sugar until well blended.
- Spread the cream cheese filling over the cooled cake layer and refrigerate for at least four hours before serving.