Imagine sinking your teeth into a sweet, chocolatey nest that cradles colorful candy eggs, each bite bursting with the joy of Easter celebrations. The rich aroma of melted chocolate wafts through the air, inviting you to indulge in this delightful treat that combines the perfect crunch and creamy sweetness, making it irresistible for kids and adults alike.
I remember crafting these Chocolate Easter Nests with my family as a cherished tradition, laughter echoing as we decorated our creations. These nests are not just a dessert; they’re a celebration of togetherness, ideal for egg hunts or festive gatherings where smiles abound and memories are made. Get ready to dive into a flavor experience that promises to be both fun and delicious!
Why Is Chocolate Easter Nests So Irresistibly Good?
Delightful chocolate nests bring joy to any Easter celebration! Quick and easy, these treats can be whipped up in just 15 minutes, making them perfect for last-minute festivities. Decadent chocolate combined with crunchy rice cereal creates a delightful texture that everyone loves. Versatile decorations like candy eggs let you customize each nest, ensuring they’re both beautiful and fun! Plus, they’re a hit with kids and adults alike—who can resist a sweet treat that’s as charming as it is delicious?
Chocolate Easter Nests Ingredients
- For the Chocolate Mixture
- 2 cups chocolate chips (semi-sweet or milk chocolate) – This forms the delicious base of your nests, melting beautifully for a rich flavor.
- 1 cup crispy rice cereal – Adds delightful crunch and texture to your nests, making them irresistibly fun to eat.
- 1/2 cup peanut butter (smooth or crunchy) – Enhances the flavor with a nutty richness and helps bind the mixture together.
- For Decoration
- 1 cup candy eggs (such as chocolate eggs or jelly beans) – These colorful treats add a festive touch and make your Chocolate Easter Nests even more appealing!
Creating Your Sweet Treats
1. Melt the chocolate chips and peanut butter together in a double boiler over low heat, stirring until smooth. This creates a luscious, glossy mixture that will hold everything together beautifully.
2. Combine the crispy rice cereal with the melted chocolate blend. Remove from heat and stir in the 1 cup of crispy rice cereal until well coated. The mixture should be delightful and sticky, ready to form into nests.
3. Prepare a baking sheet by lining it with parchment paper. This will prevent sticking and make cleanup a breeze after your fun crafting session.
4. Form small nests with the chocolate mixture on the parchment paper using your hands or a spoon, creating a hollow center for those yummy candy eggs. Aim for about 3-4 bites per nest!
5. Chill the nests in the refrigerator for about 10 minutes to set firmly. You want them to harden slightly, making them easy to handle without falling apart.
6. Fill each nest with candy eggs once set, adding 1 cup of colorful chocolate eggs or jelly beans to bring your creation to life! The vibrant colors will make these nests irresistible.
7. Serve immediately or store in an airtight container for later enjoyment. These Chocolate Easter Nests are perfect for sharing with family and friends during your celebrations.
Optional: For added flair, sprinkle some extra crispy rice cereal on top before serving!
Exact quantities are listed in the recipe card below.
Expert Tips From My Kitchen
- Chocolate Choice: Use high-quality chocolate chips for a richer flavor. Semi-sweet or milk chocolate both work beautifully in your Chocolate Easter Nests.
- Peanut Butter Consistency: Opt for smooth peanut butter for a creamier texture, or crunchy if you prefer some added bite in your nests.
- Cereal Coating: Make sure to thoroughly coat the crispy rice cereal with the chocolate mixture to avoid dry spots and ensure every bite is delicious.
- Nest Formation: When shaping the nests, be gentle but firm; too little pressure may cause them to fall apart, while too much can lead to flat nests.
- Chilling Time: Don’t rush the chilling process! Letting the nests set in the fridge for at least 10 minutes ensures they hold their shape when filled with candy eggs.
Storage and Freezing Guidelines

- Room Temperature: Keep your Chocolate Easter Nests in an airtight container for up to 3 days. This will help maintain their delicious texture and sweetness.
- Fridge: If you prefer a firmer treat, store them in the fridge for up to a week. Just ensure they’re covered to prevent them from absorbing other odors.
- Freezer: You can freeze Chocolate Easter Nests for up to 2 months. Wrap each nest tightly in plastic wrap before placing them in a freezer-safe container.
- Thawing: When you’re ready to enjoy, thaw the nests in the fridge overnight for the best texture and flavor.
Customize Your Delicious Bites
Feel free to get creative with this delightful recipe and make it uniquely yours!
- Dark Chocolate: Swap semi-sweet or milk chocolate chips for dark chocolate chips for a richer, slightly bitter taste. This variation is perfect for those who enjoy a deeper chocolate flavor that beautifully contrasts with the sweetness of candy eggs.
- Nut-Free: Use sunbutter or soy nut butter instead of peanut butter to keep it allergen-friendly. This ensures everyone at your table can indulge in these festive treats without worry while still enjoying that nutty essence.
- Coconut Crunch: Mix in 1/2 cup of shredded coconut with the crispy rice cereal for an added tropical twist. The coconut will lend a chewy texture and subtle sweetness, making each bite even more delightful.
- Spicy Kick: Add a pinch of cayenne pepper to the melted chocolate mixture for a surprising heat. This unexpected kick will tantalize your taste buds and bring a fun zing to your Easter celebrations.
- Mini Marshmallows: Incorporate mini marshmallows into the chocolate mixture for a gooey surprise. The soft, fluffy texture complements the crunchiness of the nests, creating a delightful contrast that kids and adults will love.
- Fruit-Flavored Candies: Instead of traditional candy eggs, use fruit-flavored jelly beans for a burst of fruity goodness. This swap adds bright flavors that’ll make your nests pop with cheerful colors and tastes!
- Peanut Butter Drizzle: Drizzle some melted peanut butter over the finished nests for an added layer of flavor. This extra touch not only enhances the presentation but also deepens that comforting peanut butter taste throughout the treat.
- Granola Base: Substitute crispy rice cereal with granola for an earthy twist. The combination of oats and seeds introduces heartiness and additional texture, making these nests both delicious and nutritious!
Make Ahead Options
If you’re looking to streamline your Easter celebrations, these Chocolate Easter Nests are perfect for meal prep! You can easily prepare the chocolate mixture in advance by melting 2 cups of chocolate chips with 1/2 cup of peanut butter in a double boiler until smooth, then stirring in 1 cup of crispy rice cereal. After forming the nests on parchment paper, you can refrigerate them for up to 24 hours before decorating. When you’re ready to serve, simply fill each nest with 1 cup of candy eggs like chocolate eggs or jelly beans. For best quality, store the nests in an airtight container and enjoy them within 3 days for optimal freshness. This way, you save time and can focus on enjoying the festivities with your loved ones!
Common Questions About This Recipe
What kind of chocolate chips should I use for Chocolate Easter Nests?
You can use either semi-sweet or milk chocolate chips based on your family’s preference. Semi-sweet chocolate gives a rich, balanced flavor, while milk chocolate offers a sweeter, creamier taste.
Can I substitute the peanut butter in the recipe?
Absolutely! If you’re looking for a nut-free option, you can use sunflower seed butter or even almond butter if allergies aren’t a concern. Just make sure to choose a smooth variety for easy melting and mixing.
How can I store leftovers after making Chocolate Easter Nests?
Store your delicious nests in an airtight container at room temperature for up to 3 days. If you want them to last longer, refrigerate them for about a week. Just be aware that refrigeration may affect their texture slightly.
Can I freeze Chocolate Easter Nests?
Yes, you can freeze these tasty treats! Simply place them in an airtight container with layers of parchment paper in between to prevent sticking. They’ll keep well in the freezer for up to 2 months. When ready to enjoy, let them thaw at room temperature for about 30 minutes.
What if my nests don’t hold their shape?
If you find that your nests are collapsing or not holding together well, it might be due to not enough crispy rice cereal mixed in or the mixture being too warm when forming the nests. Make sure you let the melted mixture cool slightly before shaping and ensure it’s thoroughly coated with cereal.
How many servings does this recipe yield?
This delightful recipe makes about 4 servings, with each serving containing approximately 200 calories. Perfectly sized for sharing with family during your Easter celebrations!
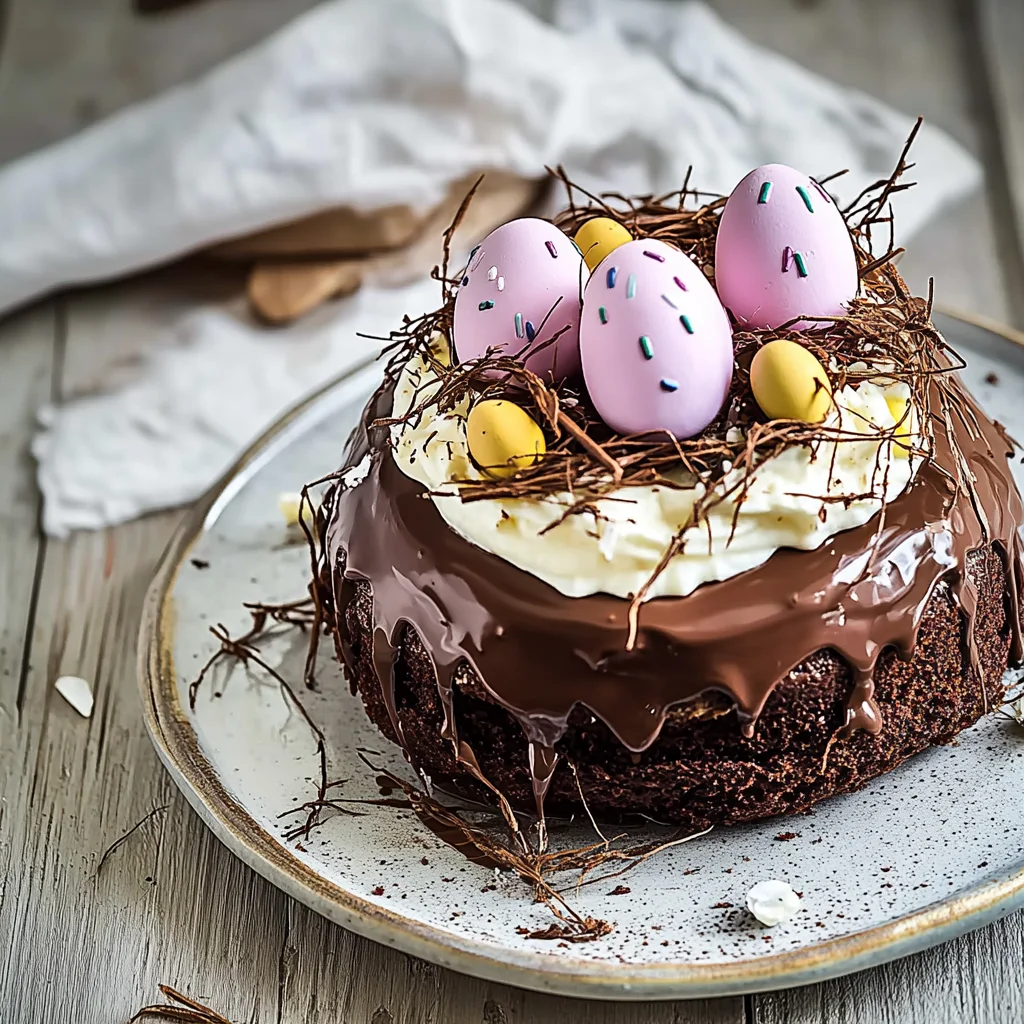
Chocolate Easter Nests
Ingredients
Method
- Melt the chocolate chips and peanut butter together in a double boiler over low heat, stirring until smooth.
- Remove from heat and stir in the crispy rice cereal until well coated.
- Line a baking sheet with parchment paper.
- Using your hands or a spoon, form small nests with the chocolate mixture on the parchment paper, creating a hollow center.
- Place the nests in the refrigerator for about 10 minutes to set.
- Once set, fill each nest with candy eggs.
- Serve immediately or store in an airtight container.