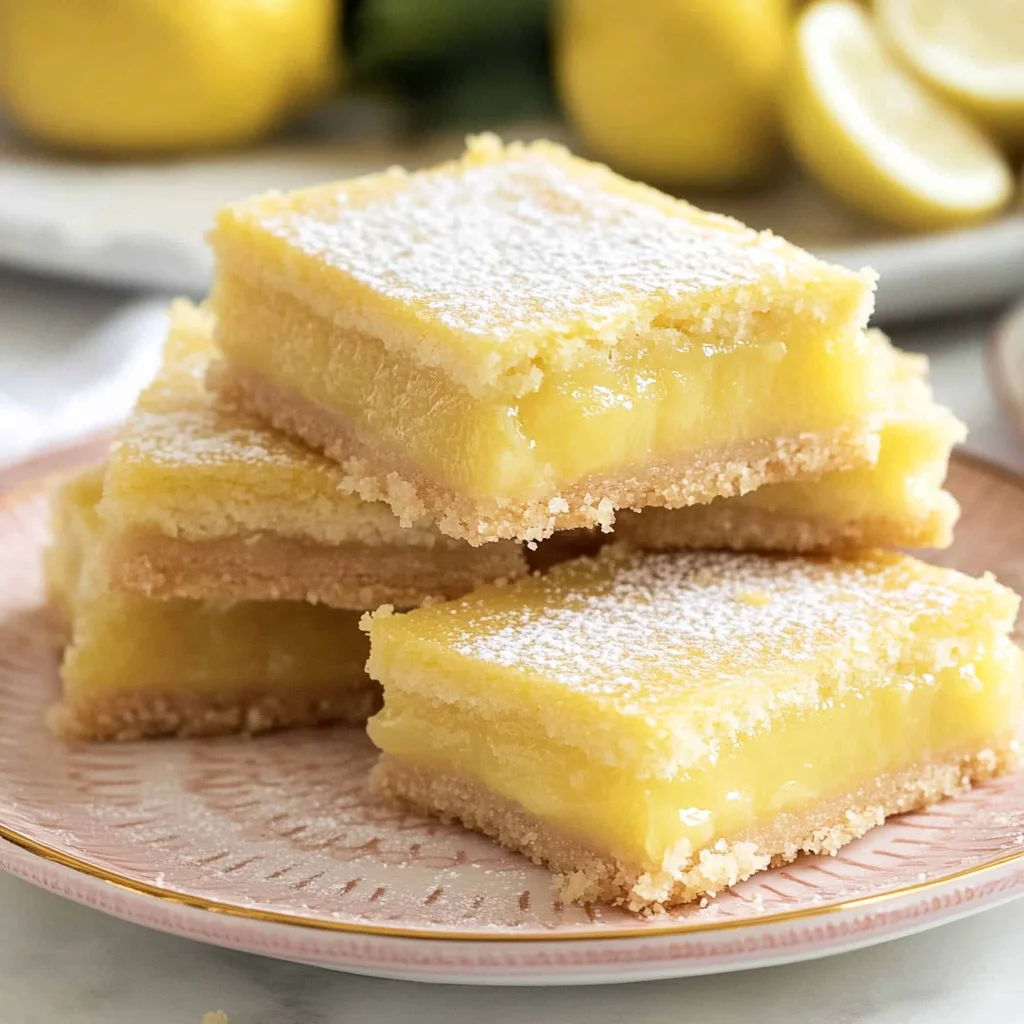
Imagine sinking your teeth into a luscious lemon bar, where the zesty burst of citrus dances on your tongue, perfectly balanced by a rich, buttery crust that crumbles just right. The aroma wafts through the air, inviting you to savor this delightful treat—an experience that promises to brighten up even the dullest of days.
These lemon bars hold a special place in my heart, often bringing back memories of sunny afternoons spent baking with family in the kitchen. Whether it’s a summer picnic or a cozy gathering with friends, these bars are the ultimate companion for any occasion, ready to surprise your taste buds with their irresistible tanginess and sweetness. Get ready to indulge in an explosion of flavor that will leave you craving more!
Why Does Everyone Love lemon bars?
Irresistible sweetness meets tangy zest in these delightful lemon bars that will leave your taste buds dancing!
- Quick and easy to whip up in just 15 minutes of prep, making them a perfect last-minute dessert.
- Buttery crust provides a delightful contrast to the bright, citrusy filling that is utterly refreshing.
- Versatile enough for any occasion—be it a summer picnic or cozy family gathering.
- Crowd-pleaser: their vibrant flavor ensures they disappear fast at parties and potlucks.
Once you try this recipe, you’ll find yourself making lemon bars again and again!
lemon bars Ingredients
For the Crust
- 1 cup all-purpose flour – This forms the base of your lemon bars, giving them a delightful, crumbly texture.
- 1/4 cup granulated sugar – Adds just the right amount of sweetness to balance the tangy filling.
- 1/2 cup unsalted butter (softened) – Ensures a rich, buttery flavor; make sure it’s softened for easy mixing.
- 1/4 teaspoon salt – Enhances the overall flavor, bringing out the sweetness in your lemon bars.
For the Filling
- 1 cup granulated sugar – Sweetens the filling beautifully and complements the tartness of the lemons.
- 2 large eggs – Provides structure and richness, helping bind all ingredients together seamlessly.
- 1/4 cup fresh lemon juice – Key for that zesty, tangy flavor that makes these lemon bars irresistible.
- 1 tablespoon lemon zest – Intensifies the citrus aroma, adding vibrancy to your delicious lemon bars.
- 1/4 cup all-purpose flour (for thickening) – Thickens the filling perfectly, ensuring it sets just right after baking.
- 1/2 teaspoon baking powder – Helps give your filling a light and airy texture, enhancing every bite.
Steps to Create the Perfect Treat
1. Preheat your oven to 350°F (175°C) to create the perfect baking environment for your lemon bars. This step ensures that your crust will bake evenly and develop a lovely golden color.
2. Combine flour, sugar, and salt in a mixing bowl. This dry mixture will form the foundation of your buttery crust, giving it just the right sweetness and texture.
3. Add softened butter to the dry ingredients and mix until crumbly. The goal here is to create a sandy texture that will hold together beautifully when pressed into the pan.
4. Press the crumbly mixture firmly into the bottom of your baking pan. Make sure it’s evenly spread out so that every bite of your lemon bars has that delicious buttery crust.
5. Bake for 15 minutes or until lightly golden. You’ll know it’s ready when you see that lovely golden hue on the edges, which adds depth to your dessert.
For the Filling:
6. Whisk together sugar, eggs, fresh lemon juice, lemon zest, flour, and baking powder in a separate bowl until smooth. This mixture will become your tangy-sweet filling, bursting with fresh citrus flavor!
7. Pour the luscious filling over the baked crust carefully. Spread it out evenly so every square of your lemon bars is infused with that zesty goodness.
8. Bake for an additional 20 minutes or until the filling is set. You’ll want it to have a slight jiggle but not be liquid—this ensures a perfect texture!
9. Allow to cool completely, then cut into squares and dust with powdered sugar if desired for that extra touch of sweetness and elegance.
Optional: Dust with powdered sugar before serving for an elegant finish!
Exact quantities are listed in the recipe card below.
Helpful Hints from My Kitchen
- Butter Temperature: Use softened butter for the crust; cold butter can lead to a tough texture and uneven baking.
- Zesty Freshness: Always opt for fresh lemon juice and zest. Bottled juices lack the vibrant flavor essential for tangy lemon bars.
- Proper Mixing: Whisk the filling until smooth to avoid lumps. This ensures a creamy consistency in your lemon bars, enhancing their appeal.
- Baking Time: Keep an eye on the filling as it bakes. Overbaking can lead to a dry texture, while underbaking results in a gooey center.
- Cooling Period: Allow your lemon bars to cool completely before cutting. This helps them set properly and prevents messy squares.
Storage and Freezing Tips for Your Desserts

- Room Temperature: Keep lemon bars in an airtight container for up to 2 days. This is perfect if you plan to enjoy them quickly!
- Fridge: Store lemon bars in the refrigerator for up to 5 days. Make sure they’re covered to maintain freshness and prevent drying out.
- Freezer: For longer storage, freeze lemon bars wrapped tightly in plastic wrap and then aluminum foil for up to 3 months. Thaw in the fridge overnight before enjoying.
- Reheating: If you like your lemon bars slightly warm, pop them in a preheated oven at 350°F (175°C) for about 10 minutes. Enjoy that delightful gooeyness!
Personalize Your Sweet Creation
Feel free to get creative and customize your tangy treat with these delightful variations!
- Gluten-Free: Substitute all-purpose flour with a 1:1 gluten-free blend for a deliciously inclusive dessert. This swap ensures everyone can enjoy the zesty goodness without sacrificing flavor or texture.
- Nutty Crust: Replace half of the all-purpose flour with almond flour, adding a subtle nuttiness to your base. The nutty flavor pairs beautifully with the tart lemon filling, creating a delightful contrast.
- Herb-Infused: Add finely chopped fresh rosemary or thyme to the crust for an unexpected twist. Just a teaspoon will elevate your bars, giving them an aromatic depth that complements the citrus perfectly.
- Coconut Cream: Use coconut oil instead of butter in the crust for a tropical flair. This substitution adds richness while lending a hint of coconut flavor that dances beautifully with the lemon.
- Berry Burst: Fold in fresh blueberries or raspberries into the filling before baking. The sweet-tart berries create bursts of flavor that pair wonderfully with the tangy lemon, making each bite even more exciting.
- Spicy Kick: Add a pinch of cayenne pepper to the filling for a surprising heat. This subtle spice enhances the sweetness and creates an intriguing balance that will delight adventurous palates.
- Chocolate Drizzle: Top cooled bars with melted dark chocolate for an indulgent finish. The rich chocolate contrasts beautifully with the tartness of lemon, making it an irresistible treat.
Make Ahead Options
Preparing these delightful lemon bars is a breeze, especially when you want to save time during busy weeks. You can make the buttery crust ahead of time by combining 1 cup of all-purpose flour, 1/4 cup of granulated sugar, and 1/4 teaspoon of salt with 1/2 cup of softened unsalted butter until crumbly. Press this mixture into your baking pan and bake it for 15 minutes. The filling, made with 1 cup of granulated sugar, 2 large eggs, 1/4 cup of fresh lemon juice, 1 tablespoon of lemon zest, 1/4 cup of flour for thickening, and 1/2 teaspoon of baking powder, can be whisked together in advance and stored in the fridge for up to 24 hours. On serving day, simply pour the mixture over your pre-baked crust and bake for an additional 20 minutes until set. Allow them to cool before cutting into squares—this ensures they maintain their texture and flavor! Enjoy the convenience of having luscious lemon bars ready to impress at a moment’s notice!
Common Questions About This Delicious Dessert
Can I use a different type of flour for the crust?
Yes, you can substitute all-purpose flour with a gluten-free blend if you’re looking for a gluten-free option. Just ensure that the blend has a good binding quality to maintain the texture of the crust.
How should I store leftover lemon bars?
Store your lemon bars in an airtight container in the refrigerator for up to a week. This helps maintain their texture and keeps them fresh while you enjoy their tangy goodness!
Can I freeze lemon bars?
Absolutely! Lemon bars freeze well. To freeze, wrap them tightly in plastic wrap and then place them in an airtight container. They can be frozen for up to three months. Thaw in the refrigerator overnight before serving.
What if my filling didn’t set properly?
If your filling didn’t set after baking for the recommended 20 minutes, it might need an extra few minutes in the oven. Keep an eye on it; it’s done when it no longer jiggles in the center and is lightly golden around the edges.
How many servings does this recipe yield?
This recipe yields about 4 generous servings, perfect for sharing—or keeping all to yourself! Each square is around 200 calories, making them a delightful treat without too much guilt.
Can I add more lemon zest for extra flavor?
Certainly! If you love that zesty punch, feel free to add an extra teaspoon of lemon zest to your filling. Just remember that too much zest may make the filling slightly bitter, so balance is key!
Lemon Bars
Ingredients
Method
- Preheat the oven to 350°F (175°C).
- In a mixing bowl, combine flour, sugar, and salt.
- Add softened butter and mix until crumbly.
- Press the mixture into the bottom of the baking pan.
- Bake for 15 minutes or until lightly golden.
- In a separate bowl, whisk together sugar, eggs, lemon juice, lemon zest, flour, and baking powder until smooth.
- Pour the filling over the baked crust.
- Bake for an additional 20 minutes, or until the filling is set.
- Allow to cool, then cut into squares and dust with powdered sugar if desired.