The sun is shining, and a warm breeze wafts through the air, carrying with it the sweet scent of nostalgia. You know that moment when you catch a whiff of something delicious, and suddenly you’re a kid again, running barefoot on the grass, ice cream dripping down your hand and into your mouth? Well, get ready to relive that blissful childhood memory with this No Churn Cookies and Cream Ice Cream. Sweet Comforting Date Bars Imagine rich, creamy ice cream swirled with crunchy cookie bits that satisfy your sweet tooth while making you feel like a kid again.
Now, if you’re wondering why this No Churn Cookies and Cream Ice Cream recipe tops my list of favorites, let me tell you: it’s ridiculously easy to make! You don’t need an ice cream maker or any complex gadgets. All you need is a bowl, a whisk (or a good old-fashioned spoon), and about five minutes of your time. Easter Poke Cake for Celebrations Easter Cookie Cake for Spring So whether it’s a hot summer day or you just want to indulge in something sweet while binge-watching your favorite show, this dessert is perfect for any occasion.
Why You'll Love This Recipe
- This No Churn Cookies and Cream Ice Cream is incredibly easy to whip up; no special equipment required.
- The flavor bursts with creamy vanilla mingling with crunchy chocolate cookies for a delightful experience.
- Visually appealing with its contrasting colors, this treat will impress anyone who sees it.
- Versatile enough for any gathering or quiet night in front of the TV; it’s always a hit!
Ingredients for No Churn Cookies and Cream Ice Cream
Here’s what you’ll need to make this delicious dish:
- Heavy Whipping Cream: This ingredient gives the ice cream its creamy texture; opt for high-fat content for best results.
- Sweetened Condensed Milk: This thick and rich ingredient adds sweetness without the need for additional sugar.
- Vanilla Extract: Use pure vanilla extract for a more robust flavor; imitation vanilla won’t do this dessert justice.
- Chocolate Sandwich Cookies: Choose your favorite brand; crushed cookies are essential for that iconic cookies-and-cream flavor.
The full ingredients list, including measurements, is provided in the recipe card directly below.

How to Make No Churn Cookies and Cream Ice Cream
Follow these simple steps to prepare this delicious dish:
Step 1: Whip That Cream
In a mixing bowl, pour in the heavy whipping cream. Using a hand mixer or stand mixer, beat it until soft peaks form—about three minutes should do the trick. Feel free to channel your inner rock star while you whip; just don’t forget to keep an eye on those peaks!
Step 2: Add Sweetness
Once you’ve achieved those lovely peaks, gently fold in the sweetened condensed milk using a spatula. This step requires finesse—think of it as lovingly introducing two long-lost friends who can’t wait to meet each other.
Step 3: Flavor It Up
Pour in the vanilla extract and mix gently until everything is well combined. The aroma of vanilla will waft through your kitchen like an invitation to indulge!
Step 4: Cookie Crunch Time
Crush those chocolate sandwich cookies into bite-sized pieces (but not too small; we want some crunch!). Fold them into the ice cream mixture carefully so they stay chunky.
Step 5: Freeze Away
Transfer the mixture into an airtight container or loaf pan. Smooth out the top with your spatula like you’re icing a cake because we all know presentation matters—even when it’s just going to be devoured.
Step 6: The Waiting Game
Cover it tightly and pop it in the freezer for at least four hours or until firm. I recommend making this ahead of time so you can enjoy it without any impatient waiting!
When you’re ready to serve, scoop generous portions into bowls or cones and watch everyone’s faces light up with joy! Don’t forget to sprinkle extra cookie crumbs on top—because why not go big or go home?
And there you have it! Your very own No Churn Cookies and Cream Ice Cream that’s sure to bring back those sunny childhood memories while making new ones right here and now. Enjoy every creamy bite!
You Must Know
- This No Churn Cookies and Cream Ice Cream recipe is a dream come true for dessert lovers.
- It combines the simplicity of no-churn ice cream with the delightful crunch of cookies.
- Perfect for spontaneous cravings or summer parties, it’s guaranteed to impress your guests!
Perfecting the Cooking Process
Start by gathering your ingredients: heavy cream, sweetened condensed milk, and crushed cookies. Whip the cream until stiff peaks form, fold in the condensed milk, then gently mix in the cookie pieces. Pour into a container and freeze until firm. It’s that simple!
Add Your Touch
Feel free to swap out classic Oreos with other cookies like chocolate chip or mint-flavored varieties. You can also add toppings like chocolate syrup or sprinkles for extra flair. Your ice cream, your rules!
Storing & Reheating
Store your No Churn Cookies and Cream Ice Cream in an airtight container in the freezer to maintain its creamy texture. When you’re ready to enjoy, let it sit at room temperature for a few minutes before scooping.
Chef's Helpful Tips
- Use heavy cream for the best texture; lighter creams won’t whip as well.
- Be gentle when folding in cookie pieces to keep that fluffy consistency.
- For extra richness, add a splash of vanilla extract to enhance flavors.
Sometimes I whip up this No Churn Cookies and Cream Ice Cream when friends drop by unexpectedly. Their faces light up as they scoop into that creamy goodness—it’s pure joy!
FAQs:
What ingredients do I need for No Churn Cookies and Cream Ice Cream?
To make No Churn Cookies and Cream Ice Cream, you will need heavy cream, sweetened condensed milk, and crushed chocolate sandwich cookies. The heavy cream creates a rich, creamy base while the sweetened condensed milk adds sweetness. The crushed cookies provide the classic cookies and cream flavor. You can also add vanilla extract for extra depth. This recipe is simple yet delicious, making it perfect for any occasion.
How long does it take to make No Churn Cookies and Cream Ice Cream?
Making No Churn Ice Cream is quick and easy! The preparation time takes about 15 minutes to mix the ingredients. However, the ice cream needs to freeze for at least 4-6 hours or overnight for best results. Patience is key here; letting it freeze properly ensures a smooth texture that’s easy to scoop. Once fully set, you can enjoy your homemade ice cream!
Can I customize my No Churn Cookies and Cream Ice Cream?
Absolutely! While the traditional recipe uses chocolate sandwich cookies, feel free to experiment with different types of cookies or add-ins. For instance, you could use mint-flavored cookies or even brownie chunks for added texture. Additionally, consider incorporating flavors like almond or peppermint extract to give your ice cream a unique twist. Customizing allows you to tailor the ice cream to your taste preferences. For more inspiration, check out this Strawberry Cheesecake Cookies recipe.
How should I store No Churn Cookies and Cream Ice Cream?
To keep your No Cookies, store it in an airtight container in the freezer. This helps prevent ice crystals from forming on the surface. Ideally, consume it within two weeks for optimal flavor and texture. If it’s been sitting longer, let it sit at room temperature for a few minutes before scooping to soften it slightly. Enjoy every last bite!
Conclusion
In summary, making No Churn Cookies and Cream Ice Cream is a simple process requiring just a few ingredients like heavy cream and sweetened condensed milk. With minimal preparation time and no need for an ice cream maker, this recipe is perfect for everyone. No Bake Lemon Blueberry Dessert Remember to let your ice cream freeze thoroughly for the best results. Enjoy customizing this delightful dessert to suit your taste!
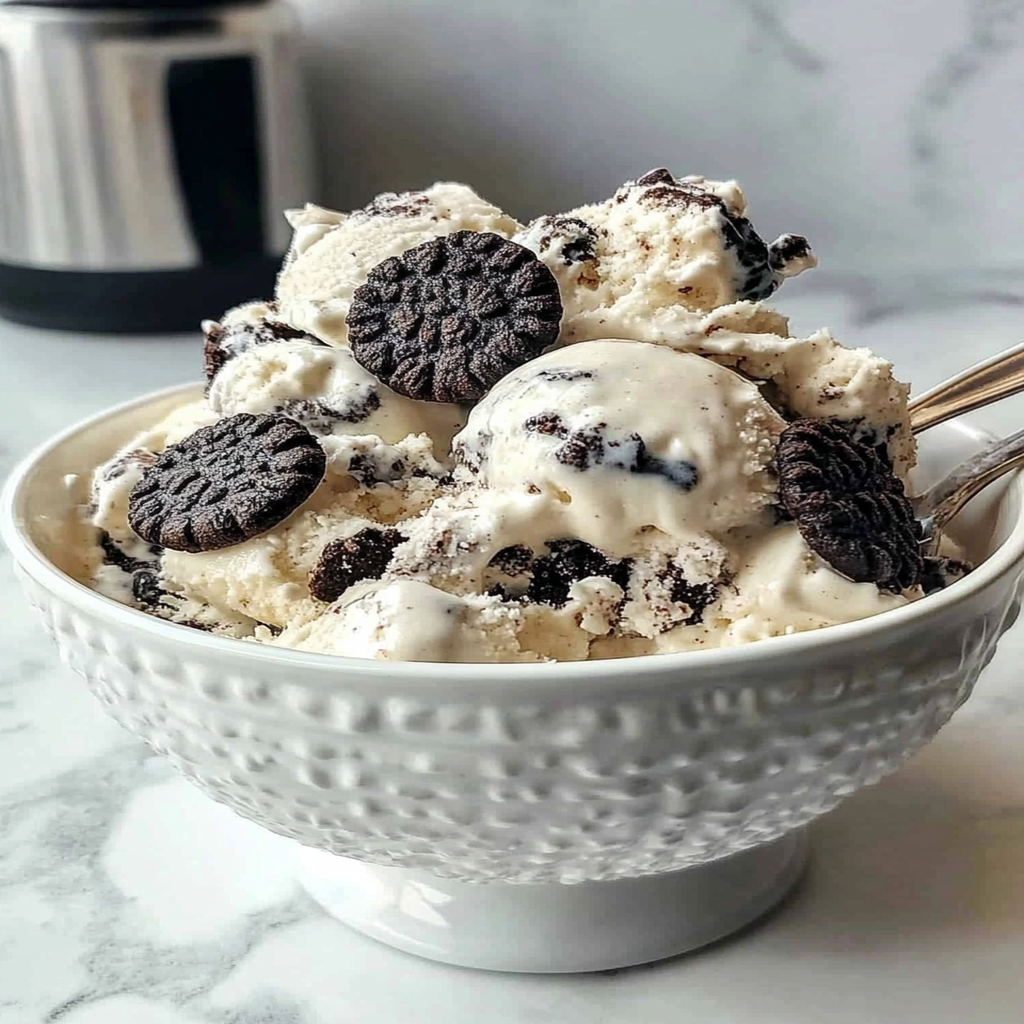
No Churn Cookies and Cream Ice Cream
Ingredients
Method
- In a mixing bowl, whip the heavy cream until soft peaks form, about 3 minutes.
- Gently fold in the sweetened condensed milk until well combined.
- Add the vanilla extract and mix gently.
- Fold in the crushed chocolate cookies until evenly distributed.
- Transfer to an airtight container and smooth the top.
- Freeze for at least 4 hours or until firm.