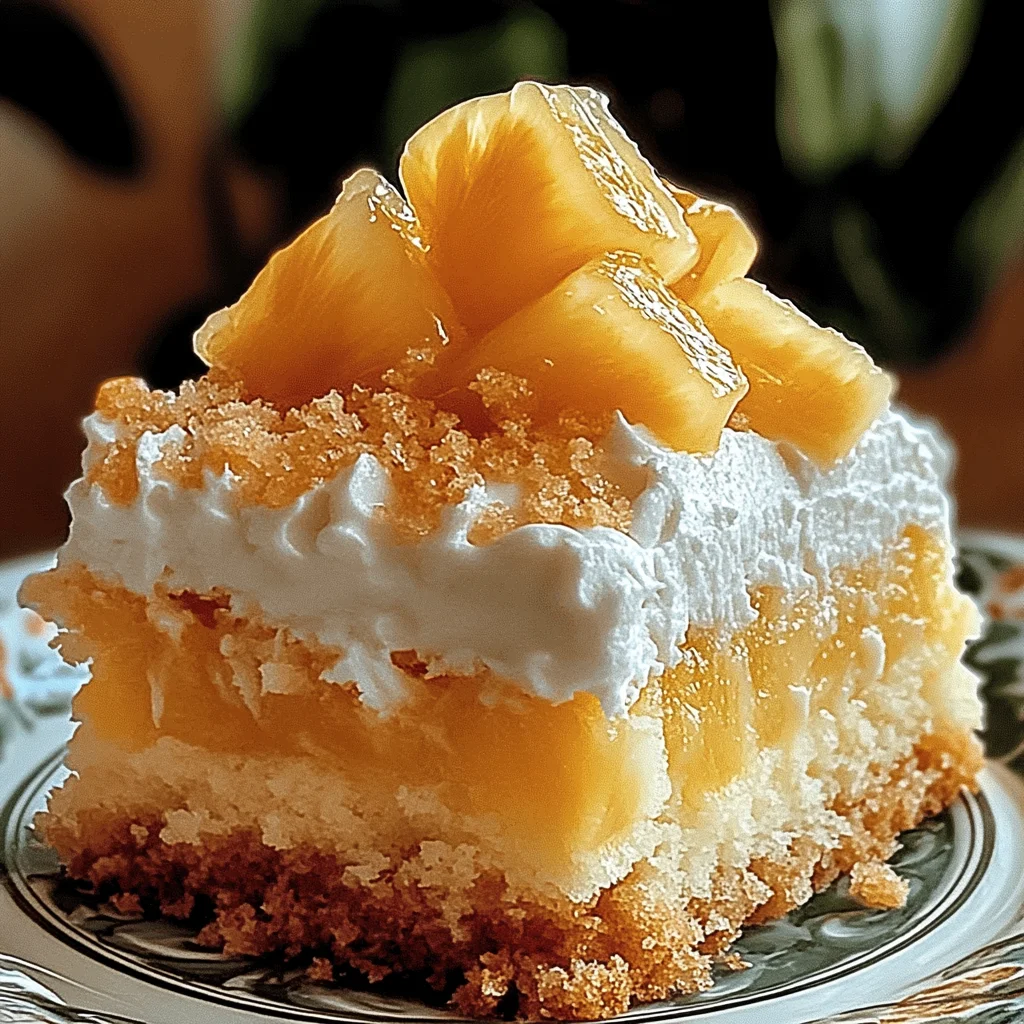
Imagine a slice of cake that dances on your palate, bursting with the sweet, tropical essence of pineapple and the airy delight of whipped cream. This Easter Pineapple Heaven Cake isn’t just dessert; it’s a celebration on a plate, ready to elevate your holiday gatherings with its luscious layers and vibrant flavors that evoke sunshine and joy.
As children, we eagerly anticipated family gatherings where this cake graced the table, its inviting aroma promising happiness in every bite. Perfect for Easter brunch or any festive occasion, this cake not only satisfies your sweet tooth but also brings back cherished memories, making each forkful an experience filled with nostalgia and delight. Get ready to indulge in a slice of heaven that will leave everyone asking for seconds!
Why Is Easter Pineapple Heaven Cake So Irresistibly Good?
Light and refreshing, this cake perfectly captures the essence of spring with its luscious layers of pineapple and creamy goodness. Quick to prepare, you’ll have this delightful treat ready in just over an hour, making it a breeze for your Easter celebrations. Crowd-pleaser alert! Everyone will rave about its tropical flavor and stunning presentation. Versatile enough to adapt with your favorite fruits or toppings, it’s a recipe you’ll turn to again and again. Elevate your gatherings with this heavenly dessert that promises to bring smiles and satisfy sweet cravings!
Easter Pineapple Heaven Cake Ingredients
For the Cake
- 2 cups all-purpose flour – This forms the base of your cake, giving it structure and a tender crumb.
- 1 cup granulated sugar – Sweetens the cake beautifully; you can substitute with coconut sugar for a caramel flavor.
- 1 tablespoon baking powder – Provides the lift needed for a light and fluffy texture.
- 1 teaspoon salt – Enhances the sweetness and balances flavors in the cake.
- 1 cup milk (whole or 2%) – Adds moisture; feel free to use almond milk for a dairy-free option.
- 1/2 cup unsalted butter (melted) – Contributes richness and helps create a moist cake.
- 3 large eggs – Binds ingredients together and adds protein for structure.
- 1 teaspoon vanilla extract – Infuses warm, sweet notes that complement the pineapple nicely.
For the Filling
- 1 can crushed pineapple (drained) – Provides natural sweetness and a tropical flair to each layer of this Easter Pineapple Heaven Cake.
- 1 cup heavy whipping cream (chilled) – Creates a luscious filling; ensure it’s chilled for the best whip.
- 1/4 cup powdered sugar – Sweetens the whipped cream without adding graininess; adjust to taste.
- 1 teaspoon vanilla extract – Adds depth of flavor to the cream, enhancing its overall richness.
For the Topping
- 1 cup heavy whipping cream (chilled) – Essential for a fluffy topping that holds its shape beautifully; keep it cold while working.
- 1/4 cup powdered sugar – Sweetens your topping perfectly, allowing you to enjoy the pineapple flavor fully.
- 1 cup pineapple chunks (for garnish) – Fresh fruit adds color and texture on top of your cake, making it visually appealing.
- 1/4 cup toasted coconut (for garnish) – Introduces crunch and a nutty flavor that pairs wonderfully with tropical ingredients.
Instructions for Creating This Delightful Treat
1. Preheat the oven to 350°F (175°C). Grease and flour two 9-inch round cake pans to ensure your cake releases easily after baking.
2. Combine flour, sugar, baking powder, and salt in a mixing bowl. This dry mixture forms the base of your cake and should be well blended.
3. Whisk together milk, melted butter, eggs, and vanilla extract in another bowl until smooth. This will create a lovely, rich batter once combined with the dry ingredients.
4. Pour the wet ingredients into the dry ingredients and mix until just combined. Be careful not to overmix; a few lumps are perfectly fine!
5. Divide the batter evenly between the prepared pans. This ensures even baking and beautiful layers for your Easter Pineapple Heaven Cake.
6. Bake for 25 minutes or until a toothpick inserted in the center comes out clean. Your cakes should be lightly golden on top.
7. Cool the cakes in their pans for 10 minutes, then remove from pans and cool completely on a wire rack. This step is crucial for perfect layering.
Filling and Assembly:
8. Beat the chilled heavy whipping cream with powdered sugar and vanilla extract in a mixing bowl until stiff peaks form. This fluffy cream will elevate your cake’s filling.
9. Fold in the drained crushed pineapple gently into the whipped cream. Be gentle here to keep that light texture while adding delicious pineapple flavor.
10. Place one layer on a serving platter and spread half of the pineapple filling on top. This creates a moist and flavorful base for your cake.
11. Add the second layer on top and spread the remaining filling over it, ensuring every bite is bursting with tropical goodness.
Topping:
12. Whip the remaining heavy cream with powdered sugar in a clean bowl until stiff peaks form again—this will coat your cake beautifully.
13. Spread the whipped cream over the top of the cake evenly to create a smooth finish that looks as delightful as it tastes.
14. Garnish with pineapple chunks and toasted coconut for that extra festive touch that truly celebrates Easter!
15. Chill the cake for at least 1 hour before serving so all those wonderful flavors meld together perfectly.
Optional: Garnish with mint leaves for an extra pop of color!
Exact quantities are listed in the recipe card below.
Expert Tips
- Perfect Flour Measure: Use the spoon-and-level method to measure flour accurately; too much flour can lead to a dense cake.
- Room Temperature Eggs: Ensure your eggs are at room temperature before mixing; they incorporate better for a fluffier texture in your Easter Pineapple Heaven Cake.
- Chilled Cream: Make sure your heavy whipping cream is thoroughly chilled; this helps achieve stiff peaks more easily when whipping.
- Gentle Folding: When combining the pineapple with the whipped cream, fold gently to maintain the lightness of the filling and avoid deflating it.
- Cooling Time: Allow cakes to cool completely on a wire rack to prevent sogginess; warm cakes can cause the filling to melt and make a mess.
- Garnish Wisely: Toast coconut lightly before adding it as a garnish for enhanced flavor; burnt coconut can overpower the lightness of your cake.
Best Practices for Storing and Freezing

- Fridge: Store the cake in an airtight container for up to 3 days to keep it fresh and moist. Make sure it’s well covered to prevent drying out.
- Freezer: For longer storage, freeze individual slices wrapped tightly in plastic wrap and aluminum foil for up to 2 months. Thaw in the fridge before serving.
- Garnishes: Keep the toasted coconut and pineapple chunks separate until you’re ready to serve the cake, ensuring they stay fresh and flavorful.
- Reheating: If you prefer your cake slightly warmed, microwave a slice for about 10 seconds. Enjoy your Easter Pineapple Heaven Cake at its best!
Customize Your Dessert Experience
Feel free to get creative and personalize this delightful dessert to make it truly your own!
- Gluten-Free: Substitute all-purpose flour with a gluten-free blend for an equally fluffy cake. This way, everyone can enjoy the sweetness of Easter together.
- Coconut Milk: Swap out regular milk for coconut milk to infuse a subtle tropical flavor. The cake will not only taste great but also add a lovely aroma that resonates with paradise.
- Lemon Zest: Add 1 tablespoon of fresh lemon zest to the batter for a zesty twist that brightens up the flavors. This little touch elevates the cake, giving it a refreshing zing that pairs beautifully with pineapple.
- Cream Cheese Filling: Mix 8 ounces of softened cream cheese into the whipped cream filling for a richer, tangy flavor. This variation creates a luscious layer that complements the pineapple perfectly.
- Chocolate Drizzle: Drizzle melted chocolate over the topping for an indulgent finish. The combination of chocolate and pineapple adds an unexpected yet delightful fusion that’s sure to impress.
- Mango Chunks: Replace pineapple chunks with fresh mango pieces for a unique tropical twist. This swap gives the cake a vibrant color and flavor profile, perfect for adventurous palates.
- Nuts Galore: Stir in 1/2 cup of chopped nuts like walnuts or pecans into the batter for added crunch. The texture contrast makes each bite even more satisfying and enjoyable.
- Spicy Kick: Add 1/2 teaspoon of cayenne pepper to the batter for a surprising heat element. This unexpected twist balances the sweetness beautifully, creating an exciting flavor experience.
Planning Ahead: Simple Make-Ahead Suggestions
Preparing your Easter Pineapple Heaven Cake ahead of time is a delightful way to ease the stress of holiday cooking. You can mix the dry ingredients like 2 cups of all-purpose flour, 1 cup of granulated sugar, and 1 tablespoon of baking powder up to 3 days in advance, storing them in an airtight container. Additionally, you can whip the heavy cream (1 cup each for filling and topping) with powdered sugar (1/4 cup each) a day ahead and keep it chilled until you’re ready to assemble. The cake layers can be baked, cooled, and wrapped tightly in plastic wrap up to 24 hours before serving; this ensures they stay moist. When it’s time to serve your cake, simply layer it with the pineapple filling (made by folding in 1 can of drained crushed pineapple into the whipped cream), top it off with whipped cream, and add garnishes like pineapple chunks and toasted coconut. Your guests will be none the wiser that you prepared this heavenly dessert ahead of time!
Frequently Asked Questions About This Recipe
What type of milk should I use for the cake?
You can use either whole milk or 2% milk for this recipe. Whole milk will give your cake a richer flavor and moisture, while 2% is a bit lighter but still works wonderfully. Just make sure it’s fresh and at room temperature for best results!
How do I store the Easter Pineapple Heaven Cake?
To keep your cake fresh, cover it loosely with plastic wrap or aluminum foil and store it in the refrigerator. This cake is best enjoyed within 3-4 days, but the flavors only get better as it sits! Just remember to bring it to room temperature before serving for that delightful creamy texture.
Can I freeze Easter Pineapple Heaven Cake?
Absolutely! If you want to prepare ahead, freeze the assembled cake without the whipped cream topping for up to 2 months. Just wrap it tightly in plastic wrap and then in aluminum foil. When you’re ready to enjoy, thaw it in the fridge overnight, then top with freshly whipped cream and garnish.
What if my whipped cream doesn’t form stiff peaks?
If your whipped cream isn’t thickening properly, ensure that your heavy whipping cream is chilled — both the cream and the mixing bowl should be cold. Whip on medium-high speed until you see soft peaks forming, then gradually add the powdered sugar. If it still seems runny, keep whipping; sometimes it just needs a little more time.
How can I adjust this recipe for dietary restrictions?
For a gluten-free version, substitute all-purpose flour with a 1: 1 gluten-free baking blend. If you’re looking for a dairy-free option, try using coconut milk or almond milk in place of regular milk and coconut cream as a substitute for heavy whipping cream. This way, everyone can enjoy this light and refreshing treat!
Is this cake suitable for large gatherings?
Yes! This recipe yields about 8 servings, making it perfect for intimate gatherings or family celebrations like Easter brunch. If you’re expecting more guests, simply double the recipe and bake in larger cake pans. It’s always nice to have extra slices of this heavenly dessert around!
Easter Pineapple Heaven Cake
Ingredients
Method
- Preheat the oven to 350°F (175°C). Grease and flour two 9-inch round cake pans.
- In a mixing bowl, combine flour, sugar, baking powder, and salt.
- In another bowl, whisk together milk, melted butter, eggs, and vanilla extract.
- Pour the wet ingredients into the dry ingredients and mix until just combined.
- Divide the batter evenly between the prepared pans.
- Bake for 25 minutes or until a toothpick inserted in the center comes out clean.
- Allow the cakes to cool in the pans for 10 minutes, then remove from pans and cool completely on a wire rack.
- In a mixing bowl, beat the chilled heavy whipping cream with powdered sugar and vanilla extract until stiff peaks form.
- Fold in the drained crushed pineapple gently into the whipped cream.
- Once the cakes are cool, place one layer on a serving platter and spread half of the pineapple filling on top.
- Place the second layer on top and spread the remaining filling over it.
- In a clean bowl, whip the remaining heavy cream with powdered sugar until stiff peaks form.
- Spread the whipped cream over the top of the cake.
- Garnish with pineapple chunks and toasted coconut.
- Chill the cake for at least 1 hour before serving.