Fried Buttermilk Chicken Tenders
Growing up, Sunday dinners at my grandmother’s house always featured her famous buttermilk fried chicken tenders. The sizzling aroma in the kitchen was a warm invitation, bringing our family together and filling the air with laughter and cherished stories. This recipe captures that deep-rooted tradition, allowing me to recreate those unforgettable moments.
The secret lies in marinating the chicken in buttermilk, which not only tenderizes the meat but also infuses it with flavor. Combined with a crunchy, seasoned breading, each bite delivers a perfect contrast of juicy inside and crispy outside—pure comfort on a plate.
What You’ll Need
- Chicken Tenderloins: These are the stars of the show! Tender and juicy, they soak up the marinade beautifully, ensuring each bite is flavorful and moist.
- Buttermilk: This magical ingredient acts as a marinade, tenderizing the chicken and infusing it with rich, creamy flavor. It’s the secret behind that crave-worthy taste!
- Salt: A crucial ingredient that enhances all the flavors. The right amount can make the difference between good and spectacular.
- Cayenne Pepper: Just a hint of heat to wake up your taste buds without overwhelming the dish. It’s a key player in the marinade.
- Garlic Powder: This adds a savory depth, ensuring every bite bursts with flavor.
- Paprika: Not just for color, paprika brings a subtle smokiness that brings the tenders to new heights.
- All-Purpose Flour: The base for our breading, providing that satisfying crunch we all crave when it comes to fried chicken.
- Baking Powder: This little hero works to give the breading an amazing lift, resulting in a wonderfully crispy exterior.
- Freshly Ground Black Pepper: A touch of earthiness that rounds out the seasoning, making each piece incredibly tasty.
- Vegetable Oil: The key for frying! Using the right oil at the right temperature ensures that beautiful golden crust we all love.
- Key Technique: Buttermilk Marinade: Soaking the chicken in buttermilk not only tenderizes it but also helps the seasoned flour cling on, resulting in a crispy coating and juicy inside.
- Garnish: A sprinkle of fresh herbs or a squeeze of lemon adds a bright finish to these tenders, taking the dish even further!
These thoughtfully selected ingredients come together to create tenders that are not just great but also evoke the experience of Sunday dinners at my grandmother’s table.

Let’s Get Cooking
In just 40 minutes, you’ll recreate those cherished Sunday dinners filled with laughter and love. Follow these steps to craft your Buttermilk Fried Chicken Tenders, and let the aroma fill your kitchen with warmth, just like Grandma used to do.
- Marinate Chicken:
Combine the chicken tenderloins with the buttermilk, salt, cayenne pepper, garlic powder, and paprika in a large sealable bag. Seal it tightly and give the bag a gentle massage until everything is well mixed and the chicken is coated. Place the bag in a bowl (to catch any leaks) and refrigerate for at least 4 hours, or up to 24 hours. This step is essential for infusing your chicken with flavor and tenderness. - Prepare Breading:
In a large bowl, whisk together the flour, baking powder, salt, black pepper, garlic powder, and paprika. Stir until perfectly blended, then add 3 tablespoons of buttermilk. Mix with a fork until the texture becomes clumpy—a few small, irregular bits are just what you want here! - Coat Chicken:
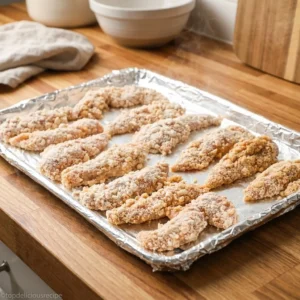
Line a baking sheet with aluminum foil for easy cleanup. Take the marinated chicken tenderloins out of the bag a few at a time and toss them into the breading mixture. Use one hand for the wet tenders and the other for breading to keep things as mess-free as possible. Press down firmly, ensuring the clumps stick to the chicken, creating a beautiful crust. Set the breaded tenders aside on the baking sheet. - Heat Oil:
Line another baking sheet with paper towels and place it next to the stove. Pour vegetable oil into a large, high-sided pot until it reaches about ¾-inch deep. Heat over medium-high heat until shimmering—aim for around 350°F (175°C). A cube of bread dropped into the oil should sizzle, signaling it’s ready for the chicken. - Fry Tenders:
Using tongs, add several chicken tenders to the hot oil, ensuring not to overcrowd the pan. Listen for that delightful sizzle! Cook them for about 3-4 minutes until they are golden brown on the bottom. Carefully flip them over and fry for an additional 3-4 minutes until both sides are crispy and beautifully golden. - Drain Chicken:
Remove the cooked tenders and let them drain on the paper towel-lined sheet. Keep frying the remaining tenders in batches; if they brown too quickly, adjust the heat down a notch.
Before you know it, you’ll be serving up these crispy, juicy tenders that echo the warmth of family traditions. Enjoy the process and every bite!

Play Around with Techniques
Let’s get creative with ways to enhance these tasty buttermilk fried chicken tenders! While sticking to the same ingredients and cooking methods, there are some fun tweaks you can do to make this dish uniquely yours.
- Double Breading Tip: For an extra-crunchy finish, dip those tenders back in the buttermilk after the initial breading, then re-coat them in the flour mixture. This double layer of flavor and texture will take each bite up a notch!
- Spice It Up Tip: Feel free to play around with the spices in the breading. If you’re feeling adventurous, try adding a pinch of your favorite seasoning blend or chili powder to add some zing to your tenders.
- Cooling Technique: After frying, let the chicken tenders rest on a rack instead of paper towels. This prevents steam from making the breading soggy, keeping that crispy texture intact longer.
- Perfect Testing Tip: When frying, keep an eye on the oil temperature. If it’s too hot, the outside might brown too quickly while leaving the inside undercooked. A good rule of thumb is to test it with a small piece of bread—if it sizzles upon contact, you’re ready to fry!
So go ahead—try these tips and make these tenders a family favorite in a whole new way!
Keeping Leftovers incredible
To keep your chicken tenders tasting just as wonderful as the first day, store any leftovers in an airtight container in the fridge for up to three days. If you want to save them for later, they can be frozen as well! Just be sure to cool them completely before sealing them in a freezer-safe bag; this helps maintain that crispy texture once reheated.
When it comes time to enjoy your leftovers, I recommend reheating them in the oven. Preheat it to 375°F (190°C) and place the tenders on a baking sheet for around 10-15 minutes, flipping them halfway through. This method keeps them crispy while ensuring the chicken stays juicy inside. You can even cover them loosely with aluminum foil to prevent over-browning while they heat up—perfection every time!

Improve Your Meal Experience
Imagine sinking your teeth into those perfectly crispy buttermilk fried chicken tenders, complemented by sides that enhance every flavorful bite. It’s all about creating a meal that warms the heart and leaves everyone smiling!
Perfect Side Dishes
- Creamy Coleslaw: The cool, tangy crunch of coleslaw is the ideal counterpoint to the hot, crispy tenders. Its refreshing texture balances out the meal beautifully.
- Golden French Fries: There’s something utterly satisfying about the classic combo of chicken and fries. The salty, crispy texture of fries adds a comforting element that everyone loves.
- Garlic Mashed Potatoes: These buttery, velvety potatoes provide a creamy contrast to the crispy chicken. With each bite, you get a little bit of indulgence that rounds out the meal well.
Tasty Garnishes
- Fresh Chopped Parsley: A sprinkle of parsley not only adds a pop of color but also a fresh, herbaceous flavor that brightens up the entire dish.
- Lemon Wedges: The zesty brightness of lemon is the ultimate foil to the richness of the fried chicken. A squeeze over your tenders can improve the flavor profile.
- Hot Sauce: For those who love a little heat, a dash of your favorite hot sauce brings an exciting kick that contrasts the tender, juicy chicken.
I can’t wait for you to enjoy these tenders alongside your favorite sides and garnishes. What’s your go-to pairing when it comes to fried chicken?
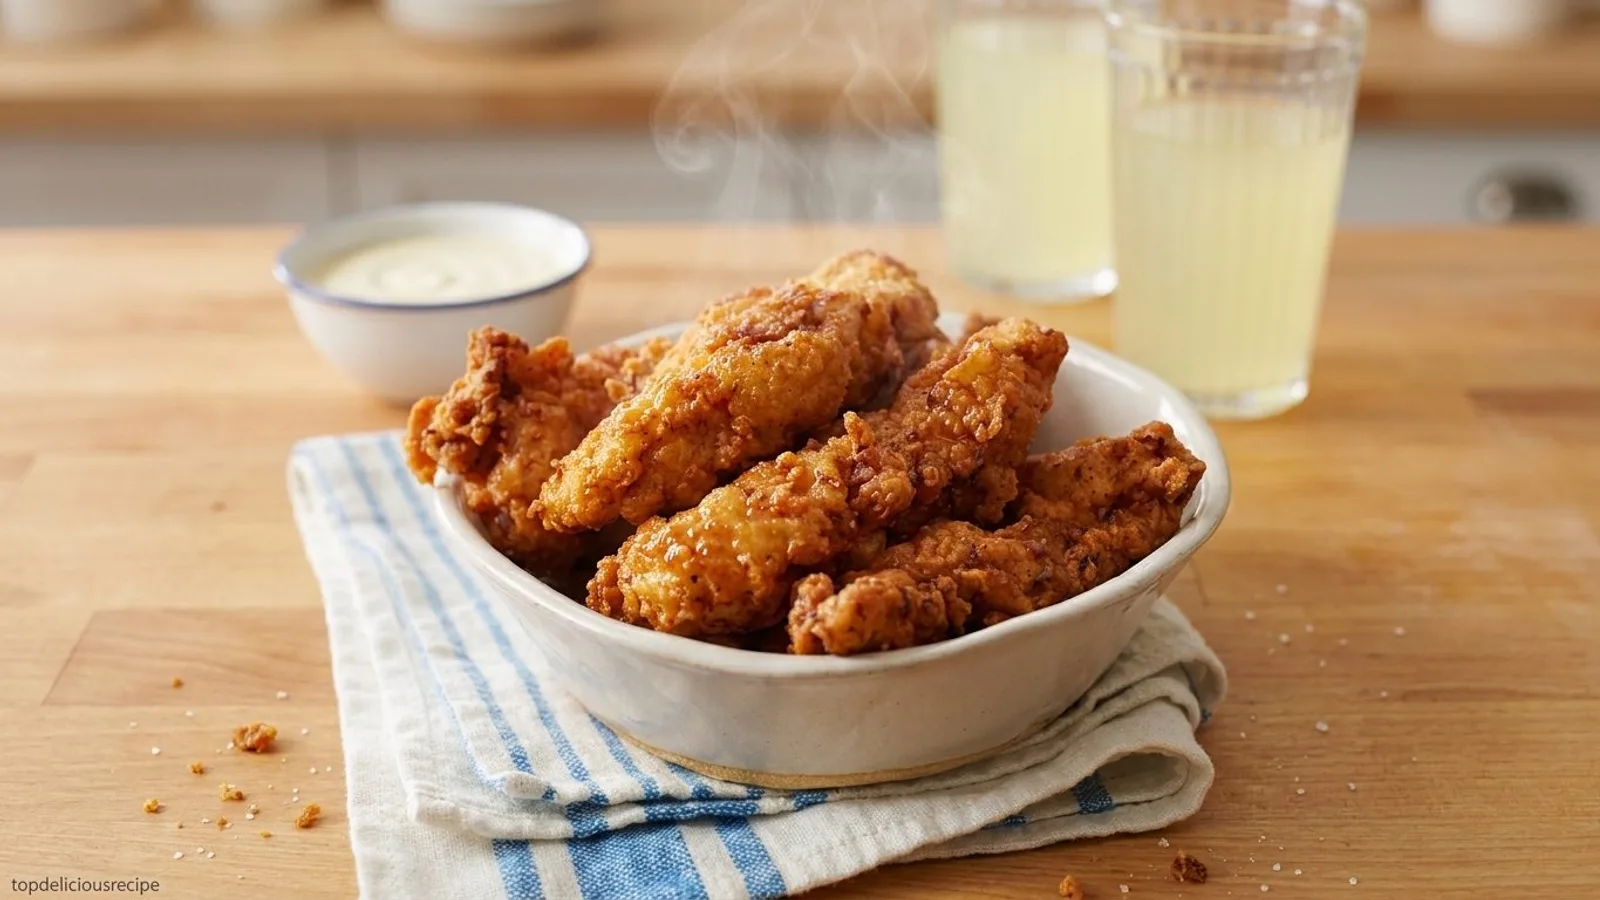
Buttermilk Fried Chicken Tenders with a Crispy Twist
Ingredients
Method
- To marinate the chicken: In a large sealable bag, combine the chicken tenders with the marinade ingredients. Seal the bag tightly and massage the chicken until it is evenly coated with buttermilk and seasoning. Place in a bowl (in case of leakage) and refrigerate for at least 4 hours or up to 24 hours.

- To make the breading: In a large bowl, combine the flour, baking powder, salt, pepper, garlic powder, and paprika. Whisk until well blended, then add the buttermilk and stir with a fork until the mixture is evenly clumpy.
- Line a baking sheet with aluminum foil for easy cleanup. Remove the chicken tenders from the marinade a few at a time and toss into the breading mixture. Be sure to press the chicken firmly into the breading so clumps adhere to the meat. (It's a messy job: use one hand to remove the wet tenders from the bag and the other to toss in the breading.) Set breaded tenders on the prepared baking sheet.
- To fry the chicken: Line another baking sheet with a few layers of paper towels and set next to the stove. Add oil to a large, high-sided pot until the level reaches about ¾-inch (2-cm). Heat over medium-high heat until oil is shimmering (about 350°/175°C). (If a cube of bread sizzles when you drop it in, it's ready.) Using tongs, place several chicken tenders in the hot oil without crowding the pan. Cook until golden brown on the bottom side, a few minutes, then flip and cook until the second side is also golden, a few minutes more. Set the cooked tenders on the paper towel-lined baking sheet to drain. Fry remaining tenders in batches adjusting the heat as necessary (if the tenders are browning too fast, lower the heat). Serve hot.